The global skin care industry generates over $180 billion per year. Much of this revenue comes from products containing the same active compounds found in ordinary foods. Lactic acid, the exfoliating ingredient in high-end serums, comes from yogurt. Ascorbic acid, the brightening agent in $60 vitamin C treatments, comes from lemons. Alpha hydroxy acids, the compounds behind professional chemical peels, exist in honey, sugar, and fruit.
This does not mean every kitchen ingredient belongs on your face. Your skin is an organ with a specific pH (around 4.5 to 5.5), a protective microbiome, and a moisture barrier made of lipids and dead skin cells. Some DIY remedies strengthen these systems. Others damage them. The difference depends on the ingredient, the concentration, the pH, and how you apply the remedy.
This guide covers ten DIY skin care remedies with documented effects. Each section includes the science behind why the ingredient works, step-by-step instructions, specific cautions, and guidance on which skin types benefit most. Every recommendation is grounded in dermatological research, not social media trends.
One important principle before you start: always patch test a new remedy. Apply a small amount to the inside of your forearm or behind your ear. Wait 24 hours. If no redness, itching, or irritation develops, the remedy is safe for your face. Skip this step and you risk a reaction on visible skin.
Honey Face Mask
Honey has been applied to skin for medicinal purposes for over 4,000 years. Ancient Egyptians used honey in skin treatments. Hippocrates prescribed honey for wounds and skin ulcers. Modern dermatology confirms these applications with controlled studies.
Raw honey contains over 200 bioactive compounds. The most relevant for skin care are glucose oxidase (an enzyme producing hydrogen peroxide), methylglyoxal, bee defensin-1, and a range of flavonoids and phenolic acids. These compounds give honey antibacterial, anti-inflammatory, and humectant properties.
The antibacterial activity makes honey effective against acne. Propionibacterium acnes (now reclassified as Cutibacterium acnes), the bacterium responsible for inflammatory acne, is susceptible to honey’s antimicrobial compounds. A 2012 study published in the European Journal of Medical Research found Manuka honey inhibited the growth of C. acnes at concentrations as low as 6.25%. A clinical trial in the Journal of Cosmetic Dermatology tested a honey-based face wash on 136 participants with mild to moderate acne. After 4 weeks, acne severity decreased in the honey group, with improvements comparable to a standard antibacterial cleanser.
Honey is a natural humectant, meaning the substance draws moisture from the air into your skin. The high sugar content of honey creates an osmotic effect, pulling water molecules toward the skin’s surface. A study published in the International Wound Journal found honey increased skin hydration levels by 14% after a single application and maintained elevated moisture levels for 4 hours.
The anti-inflammatory properties come from the flavonoids chrysin, pinobanksin, and pinocembrin. These compounds inhibit inflammatory cytokines and reduce redness and swelling. For irritated, stressed, or post-sun skin, a honey mask calms the inflammatory response within minutes.
How to Make and Apply a Honey Face Mask
Basic Honey Mask
- Use 1 to 2 tablespoons of raw, unfiltered honey. Manuka honey (UMF 10+ or MGO 250+) delivers the strongest antibacterial effect, but any raw honey works for hydration and anti-inflammatory benefits.
- Wash your face with a gentle cleanser. Pat dry. Applying honey to clean skin ensures the active compounds contact your skin directly rather than sitting on top of dirt and oil.
- Spread a thin, even layer of honey across your face using clean fingers. Avoid the eye area. The sticky texture keeps the honey in place without dripping if you apply a thin layer.
- Leave the mask on for 15 to 20 minutes. Sit upright during the application.
- Rinse with lukewarm water. Use a soft washcloth to remove residual stickiness. Pat dry.
- Follow with your regular moisturizer.
Honey and Cinnamon Acne Mask
- Mix 2 tablespoons of raw honey with 1 teaspoon of Ceylon cinnamon powder. Cinnamon contains cinnamaldehyde, which has additional antimicrobial effects against acne-causing bacteria. A study in the Journal of Microbiology found cinnamon extract inhibited C. acnes biofilm formation.
- Apply to acne-prone areas. Leave on for 10 minutes.
- Rinse thoroughly. Cinnamon causes a mild warming or tingling sensation. This is normal at low concentrations. If burning occurs, rinse immediately.
Aloe Vera Gel
Aloe vera has been called “the plant of immortality” since ancient Egypt. The gel inside aloe leaves contains 75 identified bioactive compounds, including vitamins A, C, and E, enzymes (bradykinase, alkaline phosphatase, amylase), minerals, sugars, and plant sterols. The most studied compound is acemannan, a polysaccharide responsible for many of aloe’s healing properties.
For skin care, aloe vera works through four primary mechanisms.
First, aloe hydrates without clogging pores. The gel consists of 99% water and 1% bioactive compounds. The mucopolysaccharides in aloe bind moisture to your skin, creating a hydrating layer without the occlusive feel of oil-based moisturizers. A study in Skin Research and Technology found aloe vera gel increased skin hydration significantly after a single application, with effects lasting up to 8 hours.
Second, aloe accelerates wound healing. Acemannan stimulates fibroblast activity. Fibroblasts are the cells responsible for producing collagen and repairing damaged skin tissue. A 2009 meta-analysis in the journal Burns reviewed 4 controlled trials and found aloe vera reduced wound healing time by an average of 8.79 days compared to conventional treatments.
Third, aloe reduces inflammation. The plant sterols in aloe (lupeol, campesterol, and beta-sitosterol) inhibit inflammatory enzymes. A study in the Journal of Ethnopharmacology demonstrated aloe vera gel reduced edema (swelling) by 37% in an inflammation model, performing comparably to hydrocortisone at low concentrations.
Fourth, aloe provides mild UV protection. Aloe vera does not replace sunscreen, but the compound aloin absorbs UV radiation in the UVB range. A study in Pharmacognosy Magazine found aloe vera gel provided an SPF value of approximately 3.6. This adds a small layer of daily protection when used under your regular sunscreen.
How to Use Fresh Aloe Vera
- Cut a mature leaf from an aloe plant. Choose the thickest, outermost leaves. These contain the highest gel concentration.
- Stand the leaf upright in a glass for 10 to 15 minutes. This allows the yellow latex (aloin) to drain out. Aloin is a laxative compound found between the skin and the gel layer. On skin, aloin causes irritation in some people. Draining the latex removes most of the aloin.
- Lay the leaf flat on a cutting board. Slice off the serrated edges. Cut the leaf in half lengthwise, exposing the gel.
- Scoop the clear gel with a spoon. Avoid scraping the green underlayer, which contains residual aloin.
- Apply the gel directly to clean skin. Use as a lightweight moisturizer, an after-sun treatment, or a soothing layer over irritated areas.
- Store unused gel in an airtight container in the refrigerator for up to one week. The cold gel feels especially soothing on sunburned or inflamed skin.
Aloe Vera and Vitamin E Night Treatment
- Mix 2 tablespoons of fresh aloe vera gel with the contents of 1 vitamin E capsule (pierce the capsule and squeeze the oil out).
- Add 2 drops of tea tree essential oil (optional, for acne-prone skin). Tea tree oil contains terpinen-4-ol, which kills C. acnes bacteria. A study in the Medical Journal of Australia found 5% tea tree oil as effective as 5% benzoyl peroxide for acne, with fewer side effects.
- Apply a thin layer to clean skin before bed. The aloe hydrates while vitamin E provides antioxidant protection against free radical damage accumulated during the day.
- Rinse in the morning with lukewarm water.
Oatmeal Scrub
Colloidal oatmeal (finely ground oat kernel) has FDA approval as a skin protectant. The FDA recognized colloidal oatmeal’s safety and efficacy in 2003, making oatmeal one of the few natural ingredients with formal regulatory recognition for skin care use.
Oats contain avenanthramides, a class of polyphenols unique to this grain. Avenanthramides are potent anti-inflammatory and anti-itch compounds. A study published in the Archives of Dermatological Research found avenanthramides inhibited NF-kB activation in keratinocytes (skin cells) and reduced the release of pro-inflammatory cytokines. The concentration needed for this effect was remarkably low, approximately 1 part per billion.
A clinical trial published in the Journal of Drugs in Dermatology tested a colloidal oatmeal moisturizer on 29 women with dry, itchy skin. After 2 weeks, participants showed a 38% improvement in skin dryness, a 35% improvement in scaling, and a 46% improvement in roughness. Itching decreased by 23%.
Oat beta-glucan, the same soluble fiber responsible for oats’ cholesterol-lowering properties, forms a thin film on the skin surface. This film traps moisture against your skin and protects the skin barrier from environmental irritants. A study in the International Journal of Cosmetic Science found oat beta-glucan penetrated the epidermis and stimulated collagen deposition in the dermal layer, contributing to improved skin elasticity over time.
As a physical exfoliant, ground oatmeal offers a gentler alternative to salt scrubs, sugar scrubs, or synthetic microbeads. The rounded, soft particles of ground oats remove dead skin cells without creating microtears in the skin surface. Microtears, caused by harsh or angular scrub particles like crushed walnut shells, damage the skin barrier and increase vulnerability to infection and irritation.
How to Make an Oatmeal Scrub
Soothing Oatmeal and Honey Scrub
- Grind 2 tablespoons of rolled oats in a blender or food processor. Pulse until the oats reach a fine, flour-like consistency. Avoid over-grinding into a powder. A slightly coarse texture provides the exfoliating action.
- Mix the ground oats with 1 tablespoon of raw honey and 1 tablespoon of plain yogurt. The honey adds antibacterial and humectant properties. The yogurt contributes lactic acid, an alpha hydroxy acid (AHA) providing gentle chemical exfoliation alongside the physical exfoliation of the oats.
- Apply the mixture to damp, clean skin. Massage in gentle, circular motions for 30 to 60 seconds. Use light pressure. Let the oats do the work. Aggressive scrubbing irritates skin and damages the moisture barrier.
- Leave the mixture on your skin for 5 to 10 minutes after massaging. This gives the avenanthramides, honey, and lactic acid time to interact with your skin.
- Rinse with lukewarm water. Pat dry with a clean towel. Follow with a moisturizer.
Oatmeal Bath for Full-Body Relief
- Grind 1 cup of rolled oats into a fine powder (true colloidal consistency). The powder should turn the bath water milky white when added.
- Fill a bathtub with lukewarm water. Hot water strips natural oils from your skin and worsens dryness. Aim for 37 to 38 degrees Celsius (98 to 100 degrees Fahrenheit).
- Sprinkle the oat powder into the running water. Stir with your hand to distribute evenly.
- Soak for 15 to 20 minutes. Gently rub the milky water over your skin. The beta-glucan and avenanthramides coat your skin during the soak.
- Pat dry after the bath. Do not rinse off the oatmeal residue. Apply moisturizer within 3 minutes of drying to lock in the hydration.
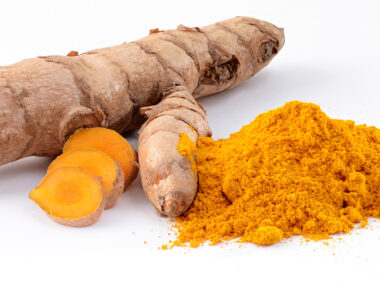
Turmeric Paste
Turmeric (Curcuma longa) has been used in Ayurvedic skin care for over 4,000 years. Indian brides traditionally apply turmeric paste before their wedding ceremony to brighten their skin. The active compound curcumin is responsible for both the golden color and the therapeutic effects.
Curcumin inhibits tyrosinase, the enzyme responsible for melanin production. Melanin is the pigment creating dark spots, hyperpigmentation, and uneven skin tone. By slowing tyrosinase activity, curcumin reduces melanin production and gradually lightens hyperpigmented areas. A study in Phytotherapy Research found curcumin reduced melanin synthesis by 26% in melanocyte cell cultures.
A clinical trial published in the Journal of Cosmetic Dermatology tested a turmeric-based cream on 28 volunteers for 4 weeks. Participants showed significant improvement in skin brightness, reduction in dark spots, and decreased sebum production. Skin hydration also improved.
Curcumin’s anti-inflammatory properties benefit acne, rosacea, and eczema. The compound inhibits NF-kB, the same inflammatory pathway involved in many skin conditions. A 2019 review in Nutrients analyzed 18 studies on curcumin and skin health and concluded the compound reduced inflammatory markers in skin tissue, improved wound healing, and protected against UV-induced photodamage.
Turmeric also delivers antioxidant protection. Free radicals from UV exposure, pollution, and metabolic processes damage collagen fibers and accelerate skin aging. Curcumin neutralizes free radicals 5 to 8 times more effectively than vitamin E, according to a study in the journal Food Chemistry.
How to Make a Turmeric Face Mask
Turmeric Brightening Mask
- Mix 1 teaspoon of turmeric powder with 2 tablespoons of plain yogurt and 1 teaspoon of raw honey. The yogurt provides lactic acid for gentle exfoliation. The honey adds moisture and antibacterial action. Together, these three ingredients address brightness, texture, and inflammation simultaneously.
- Apply the mixture evenly to clean, dry skin. Use clean fingers or a clean makeup brush for even application.
- Leave the mask on for 10 to 15 minutes. You will feel a mild warming sensation. This is normal.
- Rinse with lukewarm water. Use a damp washcloth to remove all residue. The turmeric leaves a slight yellow tint on lighter skin tones. This fades within 1 to 2 hours. Washing with a gentle cleanser after rinsing removes most of the staining immediately.
- Apply moisturizer after rinsing.
Turmeric and Chickpea Flour Mask (Traditional Ubtan)
- Mix 1 teaspoon of turmeric powder, 2 tablespoons of chickpea flour (besan), 1 tablespoon of milk or yogurt, and 1 teaspoon of honey. Chickpea flour acts as a gentle physical exfoliant and absorbs excess oil.
- Add enough milk to create a smooth, spreadable paste. The consistency should resemble thick pancake batter.
- Apply to face and neck. Leave for 15 minutes or until the mask dries.
- Dampen fingers slightly and rub the mask off in gentle, circular motions. The dried chickpea flour provides light exfoliation during removal.
- Rinse with lukewarm water and moisturize.
Coconut Oil Moisturizer
Coconut oil is one of the most debated ingredients in skin care. Social media promotes coconut oil as a cure for everything. Dermatologists warn against using coconut oil on the face. Both sides have valid points. The answer depends on your skin type and where you apply the oil.
The dominant fatty acid in coconut oil is lauric acid, which comprises 49% of the oil’s fatty acid profile. Lauric acid has strong antimicrobial properties. A study published in the Journal of Investigative Dermatology found lauric acid killed Propionibacterium acnes (the acne-causing bacterium) more effectively than benzoyl peroxide. This seems contradictory given the warnings about coconut oil and acne. The explanation lies in comedogenicity.
Coconut oil scores a 4 on the comedogenic scale (0 to 5, with 5 being the most pore-clogging). The lauric acid kills bacteria, but the thick, occlusive nature of the oil traps sebum and dead skin cells inside your pores. For oily and acne-prone facial skin, this creates new breakouts even as the lauric acid fights existing bacteria. The net result for most acne-prone individuals is worse skin.
For dry skin on the body, hands, and feet, coconut oil works well. A randomized, double-blind clinical trial published in Dermatitis compared coconut oil to mineral oil as a moisturizer for 34 patients with xerosis (dry, scaly skin). Both oils improved skin hydration and lipid levels equally. The coconut oil group showed superior improvement in skin surface lipid levels, suggesting the oil reinforced the skin’s natural fat barrier more effectively.
Coconut oil also accelerates wound healing. A study in the journal Skin Pharmacology and Physiology found virgin coconut oil increased collagen cross-linking, improved antioxidant enzyme activity, and accelerated wound closure in animal models. The medium-chain fatty acids in coconut oil provide building blocks for skin cell membranes and support the repair process.
How to Use Coconut Oil for Skin Care
- Use virgin, cold-pressed, unrefined coconut oil. Refined coconut oil undergoes processing (bleaching, deodorizing) removing some of the beneficial fatty acids and polyphenols.
- For body moisturizing: Apply a thin layer to damp skin after showering. Damp skin absorbs oil more readily than dry skin. Focus on the driest areas: elbows, knees, heels, and shins. A small amount goes a long way. Start with half a teaspoon per area.
- For cracked heels: Apply a thick layer of coconut oil to clean, dry heels before bed. Cover with cotton socks. The socks create an occlusive barrier trapping the oil against your skin all night. After 3 to 5 nights, you will notice softer, smoother heels.
- For cuticle care: Rub a small drop of coconut oil into each cuticle before bed. The lauric acid prevents hangnail infections while the oil softens the cuticle tissue.
- As a makeup remover: Coconut oil dissolves waterproof mascara, foundation, and sunscreen effectively. Massage a small amount across your face, then remove with a warm, damp washcloth. Follow with your regular cleanser (double-cleanse method) to ensure no oil residue remains in your pores.
Green Tea Toner
Green tea contains epigallocatechin gallate (EGCG), one of the most researched antioxidants in dermatology. EGCG has documented effects on acne, aging, inflammation, UV protection, and sebum regulation. The concentration of EGCG in brewed green tea is high enough to produce measurable effects when applied topically.
A 2012 randomized controlled trial published in the Journal of Investigative Dermatology tested a 2% green tea lotion on participants with acne. After 6 weeks, the green tea group showed a 58.3% reduction in total acne lesions compared to 3.2% in the placebo group. EGCG reduced sebum production by 70% at the highest concentration tested. The compound inhibits 5-alpha reductase, the enzyme converting testosterone to dihydrotestosterone (DHT), which drives sebum overproduction.
For aging skin, EGCG protects against UV-induced collagen breakdown. UV radiation activates matrix metalloproteinases (MMPs), enzymes degrading collagen in the dermis. Collagen loss leads to wrinkles and sagging. A study in the Journal of Nutrition found EGCG inhibited UV-induced MMP-1 expression by 66%, protecting existing collagen from photodamage.
The anti-inflammatory properties of EGCG reduce redness and calm reactive skin. A study in the Archives of Dermatological Research found topical green tea extract reduced erythema (redness) caused by UV exposure by 25% and reduced inflammatory cell infiltration by 45%.
Brewed green tea also contains tannins, which have astringent properties. Tannins temporarily tighten pores and reduce the appearance of enlarged pores, making green tea an ideal toner for oily and combination skin types.
How to Make Green Tea Toner
Basic Green Tea Toner
- Brew a strong cup of green tea. Use 2 tea bags or 2 teaspoons of loose-leaf green tea per cup of water. Heat water to 175°F (80°C). Steep for 5 minutes. Longer steeping extracts more catechins.
- Remove the tea bags or strain the leaves. Let the tea cool completely to room temperature.
- Pour the cooled tea into a clean, airtight glass spray bottle or a glass jar with a lid.
- Apply the toner after cleansing your face, before moisturizing. Soak a cotton pad with the tea and swipe across your face and neck. Alternatively, mist your face directly with the spray bottle.
- Let the toner air dry on your skin for 1 to 2 minutes. Follow with moisturizer or serum.
- Store the toner in the refrigerator. The cold application provides an additional de-puffing effect, especially in the morning. Use the toner within 5 to 7 days. Green tea oxidizes and loses potency over time. Brew a fresh batch weekly.
Green Tea and Aloe Vera Toner
- Brew green tea as described above. Let the tea cool.
- Mix 1/2 cup of green tea with 2 tablespoons of pure aloe vera gel. Stir or shake until blended.
- Add 3 to 4 drops of tea tree essential oil for additional antibacterial action (optional, best for acne-prone skin).
- Store in a spray bottle in the refrigerator. Shake before each use, as the aloe vera separates from the tea over time.
- Use morning and evening after cleansing. This combination delivers antioxidant protection (EGCG), hydration (aloe vera), and pore-tightening (tannins) in a single step.
Lemon Juice Spot Treatment
Lemon juice contains citric acid (5 to 6% concentration) and ascorbic acid (vitamin C, approximately 50 mg per lemon). Both compounds have documented effects on hyperpigmentation. Citric acid is an alpha hydroxy acid (AHA) providing chemical exfoliation. Ascorbic acid inhibits tyrosinase, the enzyme producing melanin in your skin cells.
A study published in the Journal of Clinical and Aesthetic Dermatology reviewed the evidence for vitamin C in treating hyperpigmentation. The researchers confirmed ascorbic acid reduced melanin formation and improved existing dark spots with consistent use over 8 to 16 weeks. The effect was most pronounced for post-inflammatory hyperpigmentation (dark marks left after acne or skin injuries).
The citric acid in lemon juice exfoliates the upper layer of dead skin cells, accelerating the turnover of pigmented cells. Fresh skin cells rising to the surface carry less melanin than the old, damaged cells being shed. This process gradually lightens dark spots.
Lemon juice delivers real results. Lemon juice also carries real risks when used incorrectly. This is the DIY skin care remedy most likely to cause harm if you ignore the precautions.
The pH of lemon juice is approximately 2.0. Your skin’s natural pH is 4.5 to 5.5. Applying undiluted lemon juice creates a pH environment far below what your skin barrier is designed to handle. This acidity damages the acid mantle (the protective film on your skin surface) and causes chemical burns at high concentrations or with prolonged exposure.
The most serious risk is phytophotodermatitis. Lemon juice contains furocoumarins, compounds making your skin extremely sensitive to UV radiation. If you apply lemon juice to your skin and then expose the treated area to sunlight, the furocoumarins interact with UV rays and cause severe burns, blistering, and hyperpigmentation far worse than the original dark spot. A case study in the Archives of Dermatology documented second-degree chemical burns from lime juice (which contains the same compounds) combined with sun exposure.
How to Use Lemon Juice Safely for Spot Treatment
- Always dilute lemon juice. Mix 1 part fresh lemon juice with 1 part water. This brings the pH closer to a safe range for skin application. Never apply undiluted lemon juice to your face.
- Apply the diluted juice only to individual dark spots using a cotton swab. Do not apply lemon juice across your entire face. Spot treatment limits exposure to the smallest necessary area.
- Leave the diluted juice on for 5 minutes maximum. Rinse thoroughly with lukewarm water.
- Apply this treatment only at night. Never before sun exposure. The furocoumarin risk persists for hours after application.
- Apply sunscreen the following morning. SPF 30 or higher. This step is non-negotiable. If you use lemon juice on your skin and skip sunscreen the next day, you risk making your hyperpigmentation worse.
- Use this treatment 2 to 3 times per week maximum. Daily use at any concentration risks damaging your skin barrier.
- Follow with a moisturizer after rinsing. The citric acid temporarily disrupts your moisture barrier. Immediate moisturizing restores the lipid layer.
Cucumber Cooling Mask
Cucumber (Cucumis sativus) contains 96% water, making the vegetable one of the most hydrating natural ingredients for skin application. Beyond water content, cucumbers contain vitamin C, caffeic acid, fisetin, and cucurbitacins. These compounds provide anti-inflammatory, antioxidant, and mild skin-lightening effects.
Caffeic acid inhibits the inflammatory enzyme cyclooxygenase-2 (COX-2). A study in the Journal of Young Pharmacists found cucumber extract reduced skin inflammation and erythema in a dose-dependent manner. The cooling sensation of cucumber on skin is not psychological. Cucumber flesh maintains a temperature 3 to 5 degrees below the ambient air temperature due to the high water content and evaporative cooling effect. This temperature difference constricts dilated capillaries and reduces visible redness.
Fisetin, a flavonoid concentrated in cucumber skin, has documented anti-aging properties. A study published in Nature Medicine found fisetin reduced senescent cells (damaged, aging cells secreting inflammatory compounds) more effectively than several other tested flavonoids. Reducing senescent cell burden in skin tissue slows the visible signs of aging.
The mild astringent properties of cucumber tighten skin temporarily and reduce the appearance of pores. A study in the journal Fitoterapia confirmed cucumber extract reduced skin laxity and improved elasticity after topical application.
Cucumber is among the gentlest ingredients on this list. The low allergenic potential and neutral pH (approximately 5.1 to 5.7, nearly identical to skin pH) make cucumber safe for every skin type, including highly sensitive and reactive skin.
How to Make a Cucumber Cooling Mask
Blended Cucumber Mask
- Peel half a cucumber and remove the seeds. The flesh contains the highest water concentration. The skin contains more fisetin and antioxidants. If your skin tolerates the mask well, try future applications with the skin included for increased antioxidant benefit.
- Blend the cucumber in a food processor or blender until smooth. The result should be a thin, watery paste.
- Apply the paste to clean skin. The mixture is runny, so lie down during application. Place a towel under your head to catch drips.
- Leave the mask on for 15 to 20 minutes. The cooling effect peaks in the first 5 minutes and gradually diminishes as the cucumber warms to skin temperature.
- Rinse with cool water. Pat dry gently.
Cucumber and Yogurt Soothing Mask
- Blend half a peeled cucumber until smooth.
- Mix the blended cucumber with 2 tablespoons of plain Greek yogurt. The yogurt thickens the mixture, preventing dripping. The lactic acid in yogurt provides gentle exfoliation. The probiotics in yogurt support your skin’s microbiome.
- Add 1 teaspoon of honey for additional hydration and antibacterial action.
- Apply to face and neck. Leave on for 15 minutes. Rinse with lukewarm water.
- This mask works especially well after sun exposure, after shaving, or during allergy season when facial skin is inflamed and reactive.
Yogurt Mask
Plain yogurt contains lactic acid, a naturally occurring alpha hydroxy acid (AHA). Lactic acid is the same compound used in professional chemical peels and commercial exfoliating serums. The concentration in yogurt is lower than clinical formulations, making yogurt a gentler introduction to chemical exfoliation.
Plain yogurt typically contains 0.7 to 1.0% lactic acid. Commercial AHA products contain 5 to 30%. The lower concentration in yogurt provides mild exfoliation without the irritation, peeling, and sensitivity associated with higher-concentration products. For people who have never used chemical exfoliants, yogurt serves as an ideal starting point.
Lactic acid works by dissolving the “glue” (desmosomes) holding dead skin cells together on your skin surface. This allows the dead cells to shed more easily, revealing fresher, brighter skin underneath. Unlike physical exfoliants (scrubs), chemical exfoliants like lactic acid work without friction, reducing the risk of microtears and irritation.
A study published in the International Journal of Cosmetic Science found lactic acid increased skin thickness (indicating improved collagen production), reduced melanin content in the epidermis, and improved skin smoothness after 12 weeks of use. These effects occurred at concentrations as low as 5%, suggesting even the lower concentrations in yogurt produce meaningful changes with consistent application over time.
Lactic acid is also the most moisturizing AHA. Unlike glycolic acid (derived from sugar cane), which tends to dry skin, lactic acid increases the production of ceramides, the lipids forming your skin’s moisture barrier. A study in the Journal of the American Academy of Dermatology found lactic acid treatment increased ceramide levels in the stratum corneum by 22%, directly strengthening the skin barrier.
The probiotics in yogurt add another dimension. Your skin hosts a microbiome of bacteria and fungi, much like your gut. Research published in Beneficial Microbes found topical application of Lactobacillus strains (the same bacteria in yogurt) reduced skin sensitivity, strengthened the skin barrier, and decreased the severity of acne and eczema flare-ups. Yogurt delivers these bacteria directly to your skin surface.
How to Make a Yogurt Face Mask
Simple Yogurt Brightening Mask
- Use 2 tablespoons of plain, full-fat, unsweetened yogurt. Greek yogurt works best because of the higher protein and lactic acid concentration due to the straining process. Avoid flavored yogurt. The added sugars and artificial flavors irritate skin and feed unwanted bacteria.
- Apply a thick layer to clean, dry skin. Use clean fingers or a brush.
- Leave the mask on for 10 to 15 minutes. You will notice a very mild tingling sensation. This is the lactic acid interacting with your skin cells. The sensation should be gentle, not burning.
- Rinse with lukewarm water. Pat dry.
- Apply moisturizer immediately.
Yogurt, Turmeric, and Honey Triple-Action Mask
- Mix 2 tablespoons of plain Greek yogurt with 1/2 teaspoon of turmeric powder and 1 teaspoon of raw honey.
- Stir until the mixture reaches a uniform color and consistency.
- Apply to face and neck. Leave on for 10 to 15 minutes.
- Rinse thoroughly. Follow with toner and moisturizer.
- This combination delivers chemical exfoliation (lactic acid from yogurt), melanin inhibition and anti-inflammatory action (curcumin from turmeric), hydration and antibacterial protection (honey). Three mechanisms working simultaneously.
Rose Water Mist
Rose water (Rosa damascena hydrosol) has been used in skin care since the 10th century, when the Persian physician Avicenna first developed steam distillation to extract rose oil and rose water. The process remains nearly identical today. Steam passes through fresh rose petals, extracting volatile compounds. The condensed steam becomes rose water, containing trace amounts of rose essential oil alongside water-soluble compounds.
Rose water contains citronellol, geraniol, nerol, eugenol, and phenylethyl alcohol. These compounds give rose water anti-inflammatory, antimicrobial, and antioxidant properties. A study published in the Iranian Journal of Basic Medical Sciences reviewed the pharmacological evidence for Rosa damascena and confirmed anti-inflammatory activity, wound healing acceleration, and analgesic (pain-relieving) effects.
The pH of rose water is 5.0 to 5.5, nearly identical to your skin’s natural pH. Most tap water has a pH of 6.5 to 8.5. Washing your face with tap water temporarily raises your skin’s pH, disrupting the acid mantle and leaving skin vulnerable to bacteria and moisture loss. Misting with rose water after cleansing restores optimal skin pH within seconds.
A study published in the Journal of Traditional and Complementary Medicine found rose water inhibited the growth of Propionibacterium acnes, Staphylococcus aureus, and Escherichia coli. The antimicrobial effect was moderate compared to pharmaceutical antibiotics but significant enough to support skin hygiene when used as a daily toner.
Rose water provides psychological benefits alongside the dermatological effects. A study in Complementary Therapies in Clinical Practice found inhalation of rose water vapor reduced anxiety scores and improved mood in participants during hemodialysis sessions. The aromatherapeutic effect of rose compounds on the limbic system creates a calming response. Your daily skin care routine becomes a stress-reduction practice when rose water is part of the process.
The hydrating effect of rose water is subtle but cumulative. Rose water does not replace a moisturizer. The water-based formula provides light hydration and prepares your skin to absorb subsequent products more effectively. Applying moisturizer or serum to slightly damp, rose-water-misted skin increases the absorption rate and efficacy of the moisturizer.
How to Make Rose Water at Home
Stovetop Simmer Method
- Use fresh, organic rose petals from untreated roses. Do not use roses from florists or garden centers treated with pesticides. The pesticide residue transfers directly to your skin. If you grow roses at home without chemical treatments, use those. Otherwise, purchase food-grade or organic dried rose petals from a reputable herbal supplier.
- Place 1 cup of fresh petals (or 1/2 cup dried petals) in a saucepan. Add enough distilled water to cover the petals without submerging them deeply. Use approximately 1.5 to 2 cups of distilled water.
- Cover the saucepan with a lid. Bring the water to a very gentle simmer over low heat. Do not boil. Boiling destroys the volatile aromatic compounds. The water should barely move.
- Simmer on low heat for 20 to 30 minutes, or until the petals lose most of their color. The water absorbs the color and compounds from the petals.
- Remove from heat. Keep the lid on. Let the mixture cool completely to room temperature.
- Strain the liquid through a fine mesh strainer or cheesecloth into a clean glass jar or spray bottle. Press the petals gently to extract remaining liquid.
- Store in the refrigerator. Homemade rose water contains no preservatives and lasts 7 to 10 days refrigerated. The cold storage also makes the mist more refreshing when applied.
How to Use Rose Water in Your Routine
- As a toner: Mist your face with rose water after cleansing, before applying serum or moisturizer. The rose water restores your skin’s pH and creates a damp base for improved product absorption.
- As a mid-day refresher: Keep a small spray bottle in your bag. Mist your face over makeup when your skin feels dry or tired during the afternoon. Rose water refreshes without disturbing makeup. Close your eyes during application.
- As a mask mixer: Use rose water instead of plain water when mixing any powdered face mask (turmeric, clay, chickpea flour). The rose water adds anti-inflammatory and pH-balancing benefits to the mask.
- As a compress: Soak cotton pads in cold rose water and place them on your eyes for 10 minutes. The cold constricts blood vessels, reducing puffiness. The anti-inflammatory compounds calm irritated eye-area skin.
- Before bed: Mist your pillow lightly with rose water. The aromatherapeutic compounds promote relaxation and improve sleep quality. Your skin contacts the rose water residue during the night, providing passive hydration.
Build Your DIY Skin Care Routine
Ten remedies are on this list. You do not need all ten. Start with two or three based on your primary skin concerns.
For acne-prone skin: Green tea toner (daily) + honey face mask (twice weekly) + yogurt mask (once weekly). This combination controls sebum, kills acne-causing bacteria, and exfoliates dead cells without harsh chemicals.
For dry, dull skin: Rose water mist (daily) + aloe vera gel as moisturizer (daily) + oatmeal scrub (once weekly). This combination restores hydration, strengthens your moisture barrier, and removes dead skin cells revealing brighter skin.
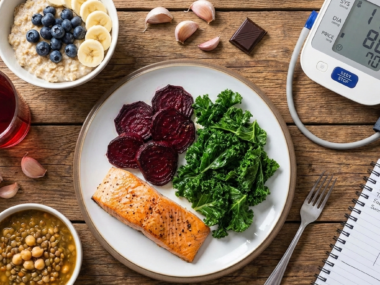
For hyperpigmentation: Turmeric mask (twice weekly) + yogurt mask (once weekly) + vitamin C-rich diet. This combination inhibits melanin production, exfoliates pigmented cells, and protects against further UV damage.
For sensitive, reactive skin: Cucumber mask (as needed) + aloe vera gel (daily) + oatmeal bath (weekly). These three ingredients have the lowest irritation potential on this list and focus on calming inflammation and protecting your skin barrier.
Consistency matters more than intensity. A simple routine followed daily for 8 weeks produces better results than an elaborate routine followed sporadically. Track your skin’s response in a simple log. Note which ingredients your skin responds well to and which cause irritation. Your skin is unique. The best DIY routine is the one built through careful observation of your own results.
One final reminder. Sunscreen is the single most important skin care product, DIY or commercial. No brightening mask, antioxidant toner, or exfoliating scrub compensates for unprotected UV exposure. Apply broad-spectrum SPF 30 or higher every morning, regardless of the weather or your plans for the day. Every remedy on this list works better when your skin is protected from UV damage.